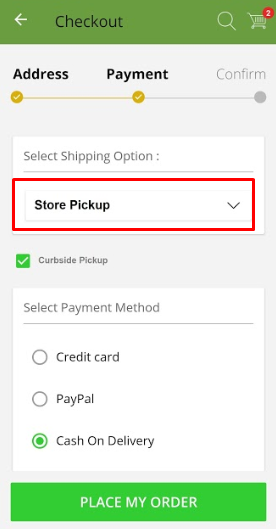
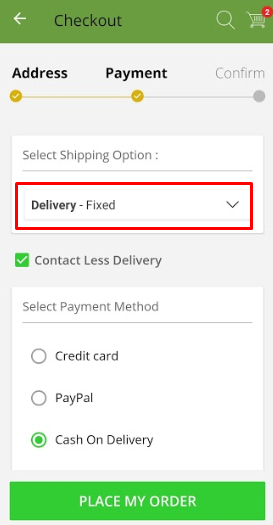
The Customer can choose whether he wishes to get his order delivered at his registered address or pick up at the store.EMC provides an option for the customers at the time of checkout to choose over Delivery or Pick up
The Delivery or Pick up System can be configured in simple steps:
Step 1: Enable Order Delivery and Store Pick up
Step 2: Enable Delivery/Pick up Slots
Step 3: Create Delivery/Pick up Slots
Note: If the app or web consists of Order delivery and pickup process, we need to enable the below things as mandatory.
- Order delivery and Order Pickup shipping methods must be enabled as mandatory
- Delivery and Pickup slot configurations must be enabled as mandatory.
First of all, it is necessary to enable the Shipping method for Delivery and Pick up. So, here is the. This will enable the preference of Store Pick up /Delivery for the customer.
Step 1: HOW TO ENABLE DELIVERY/PICK UP METHODS?
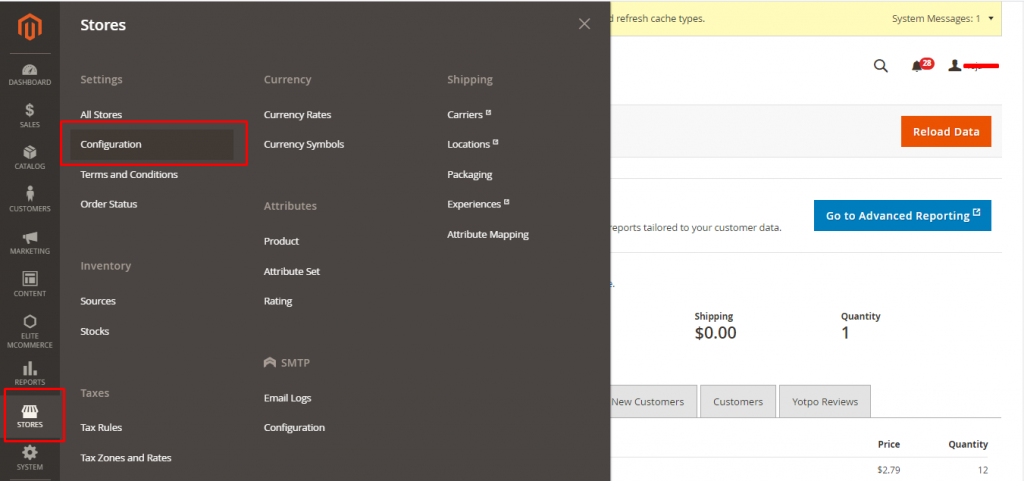
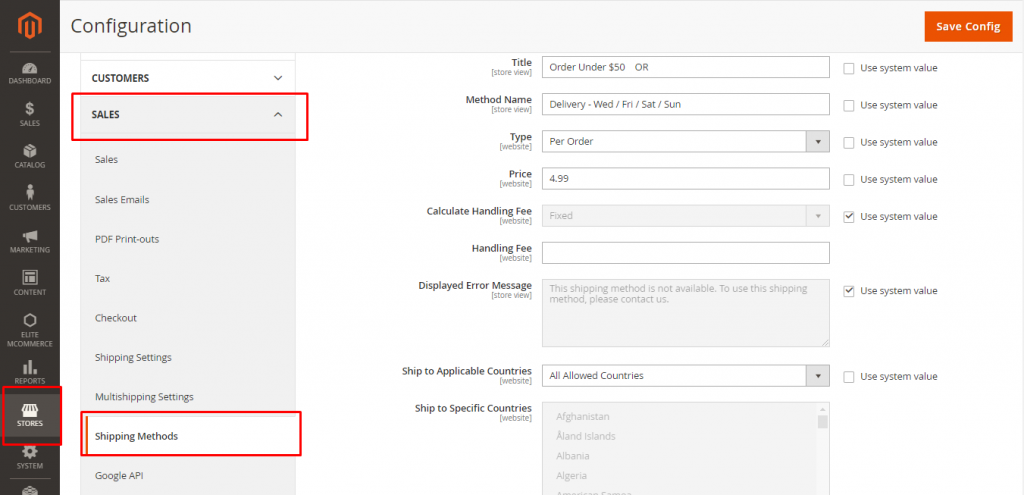
Navigate toStores → Configuration → Sales → Shipping methods.
Shipping methods will enable Delivery Preferences
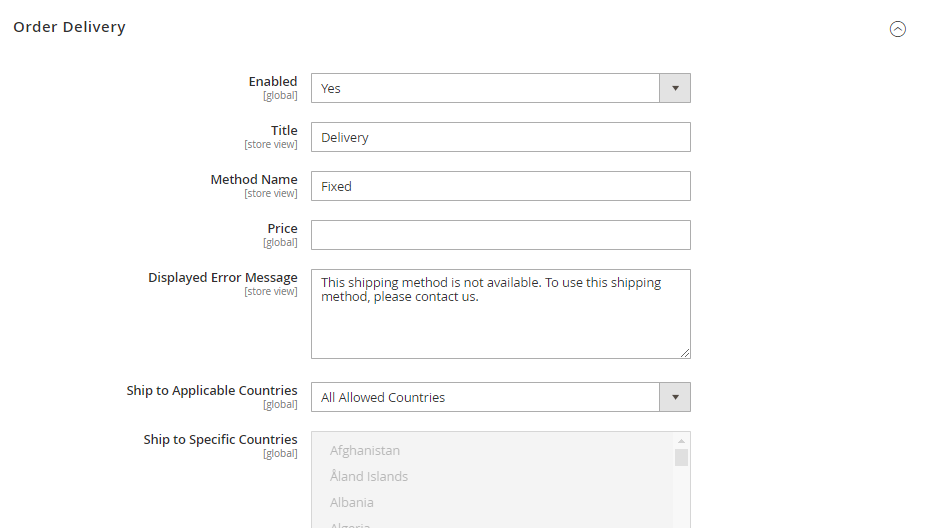
Navigate to Order Delivery keep Store View: Default Confing:
-
- Enable the delivery method
- Add the title and method name
- Set the price for the delivery method
- Set the error message to be shown to customers if any condition mismatch happens (example: if the delivery method set to a specific country)
Navigate to Order Pickup keep Store View: Default Config:
- Enable the pickup method
- Add the title and method name
- Set the error message to be shown to customers if any condition mismatch happens (example: if the delivery method set to a specific country)
The output will be:
Website:
Mobile app: (If delivery is chosen, it will show delivery method, if pickup → pickup method)
Step 2: HOW TO ENABLE DELIVERY/PICK UP SLOTS
Steps to Enable Delivery Slot:
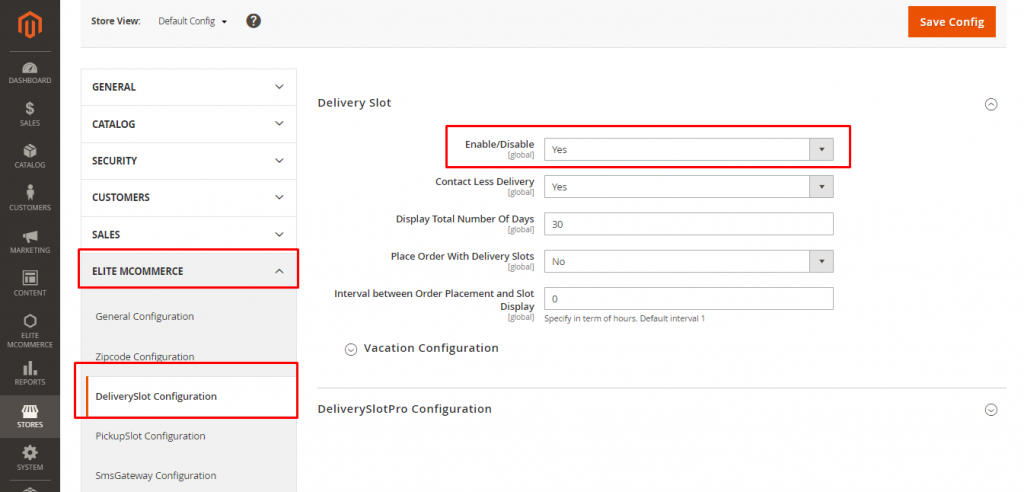
Navigate to Stores → Configuration → Elitemcommerce → Delivery slot configuration
- Enable contactless delivery checkbox if required (if it is enabled, then delivery
- Set the total number of days to display the delivery slots to customers. If it is 7 days, slots will be shown for the next 7 days from the current day..
- Place Order With Delivery Slots –
- If set YES, then delivery slots must be selected by the customers as mandatory while checkout. If no delivery slot group there for their zip code or area, then it will throw an alert as ‘No delivery slot available’.
- If set No,then delivery slots will not be required for checkout.
- Interval between Order Placement and Slot Display – Set interval between order placed time and slot display time.(Buffer time)
- Select Delivery slot pro configuration to define whether the slots need to be displayed based on Zipcode or Area. (i.e for UAE-based apps, there will be no zip code and only area fields will be available in the app. So area-based configuration will be used in this stage).
Steps to Enable Pick up Slot:
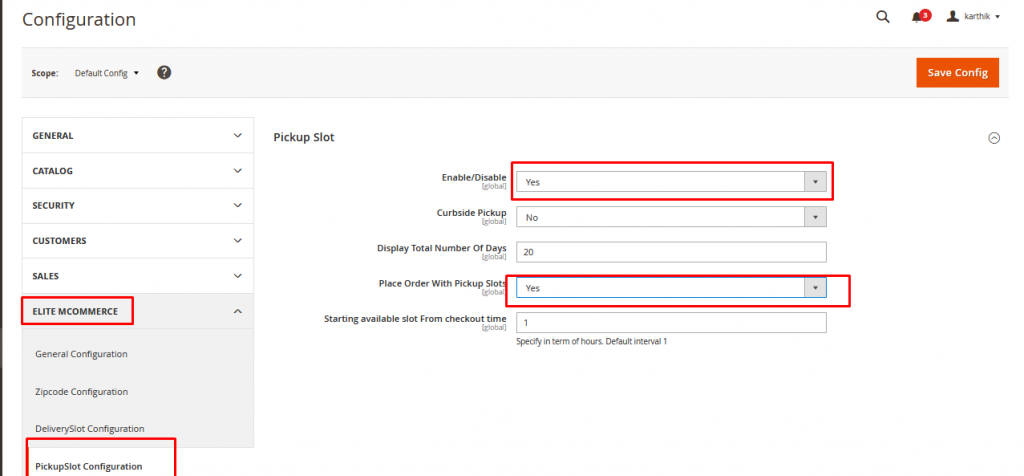
Navigate to Stores → Configuration → Elitemcommerce → Pickup slot configuration
- Enable the Pickup slot configuration.
- Enable Curbside pickup checkbox if required (if it is enabled, then Curbside pickup checkbox will be shown in Checkout screen and Curbside pickup label will be shown in My Orders of the customer).
- Set the total number of days to display the pickup slots to customers. If it is 7 days, slots will be shown for the next 7 days from the current day.
- Place Order With Pickup Slots –
- If set YES, then pickup slots must be selected by the customers as mandatory while checkout. If no slot group is mapped to the store in the app, then it will throw an alert as ‘No pickup slot available’.
- If set No, then delivery slots will not be required for checkout.
- Interval between Order Placement and Slot Display – Set interval between order placed time and slot display time. (Buffer time).
- Creating Delivery Slots is the key configuration part.
- The Slots can be created based on Zip codes or Areas( where there are not zip codes).
- It is noted that the Slots can be created only when the Slot group is created.
- Below given are basic steps to configure Slot Groups and Slots.
Step 3: HOW TO CREATE DELIVERY/ PICK UP SLOTS
Steps to Create Delivery Slots:
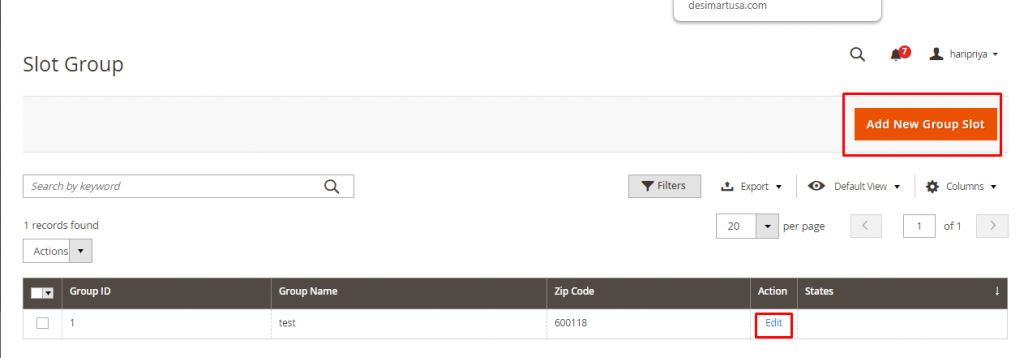
- Navigate to Elitemcommerce → Delivery slots → Create slot groups based on Zip codes. (zipcodes can be added comma separated – 70917,90784, …..)
- If the app address form has an area field instead of zip code field, then need to select the AREA and its respective State/Region. (Adding areas is explained in section 4).
- Create a slot (multiple slots can be created for a day) for each day and map it to the Slot group, so that slots will appear only to those users coming from the respective zip code/area, or else it will throw an error as slot not available for delivery.
Similarly, the Pickup Slot group and Slots are created
Steps to Create Pick up Slots:
Navigate to Elitemcommerce → Pickup slots → Create slot groups based on Stores
- Create a slot for each day and map it to the Slot group, so that slots will appear for users to pick up from the store or or it will throw errors as slots not available for pickup.
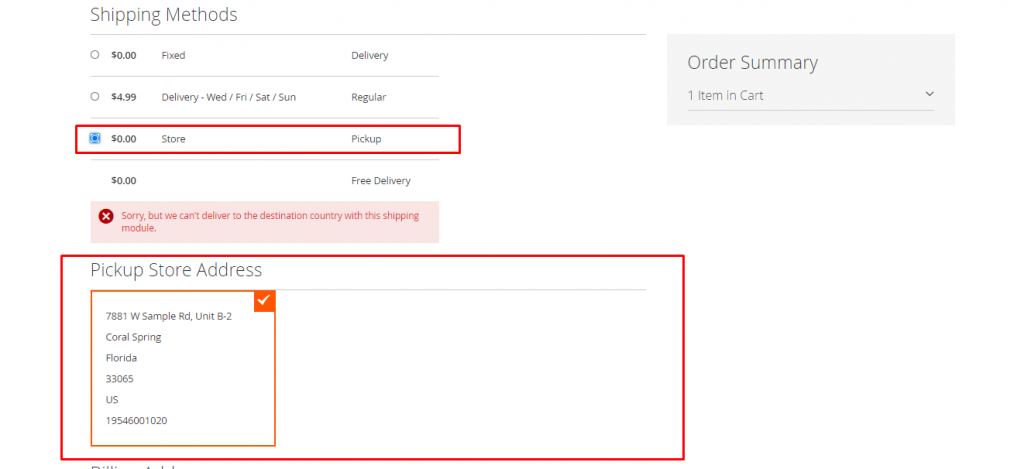
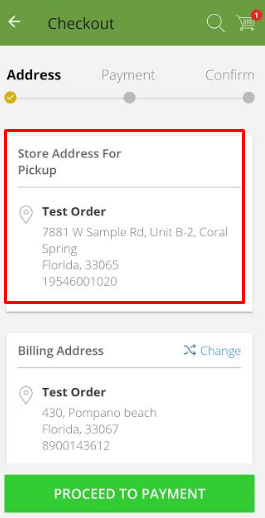
Pick up Location- would be the Store address and that needs to be updated as guided belowNavigate to Elitemcommerce → Manage store address and select the store to add store address information.
Outputs are shown below in different platforms:
Website:
The Mobile app View will be as shown below:
Pick up Mode in the Mobile app:
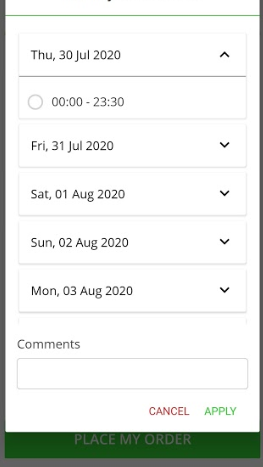
Delivery slot & Pickup slots website:
Delivery slot & Pickup slots website:
Section 4: Area Based Slots
In some countries, there are no zip codes. In that case, Slots can be managed with Areas. Mentioned below are few steps of creating Area-based Slot Groups. The configuration difference between Areas and Zip codes is creating a Slot Group. In Zip codes-based, you need to Create Slot groups and then map Slots whereas in Areas, you need to Create Areas first (as guided below), then map Area to Slot groups, and then map slot groups to newly created Slots.
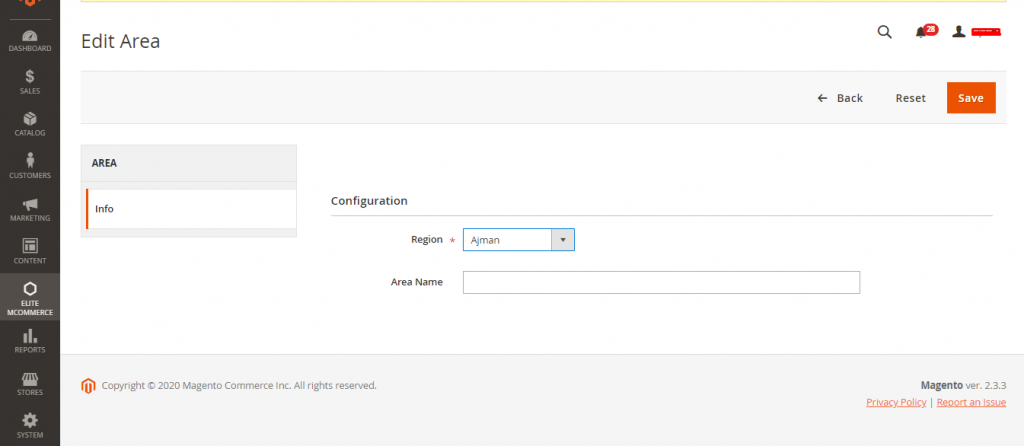
Manage Areas (if Address form in the app or website consists of Area field instead of Zip Code field, Delivery slots must be based on Area)
- Navigate to Elitemcommerce → Managearea
- Add area selecting the state/region (region for particular country need to be populated by the developer in the database)
